
There are a huge variety of tools that could be used appropriately in woodland, to help with crafting, whittling, maintenance, building shelters and a whole lot more. In all cases consideration should be given to the safety of the individuals working with the tools. When working with the tools there are a number of key considerations that should be made:
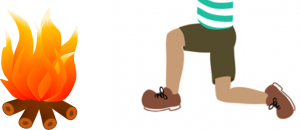
- The Respect Position: During activities, when using tools and when lighting fires we often talk about the respect position. The respect position involves kneeling on one knee. This position gives you a stable base whilst opening up space for you to use tools safely. The respect position also enables you to move quickly out of the way if you should need too. When taking the respect position think carefully about where you are kneeling in relation to the job your are completing or the tool which you are using. (Click the image below for a handout version of the respect position.
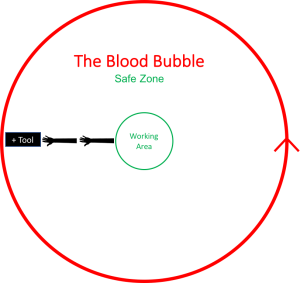
- Safe working distances: The safe working space around an individual or pair of individuals is referred to as the ‘Blood Bubble’. The name is designed to show that this is the safe distance bystanders should stay out of to avoid being hurt, when a tool is in use. The ‘Blood Bubble’ is given a consistent size(two arms and a tools length) so pupils easily remember. With younger children it maybe necessary to mark out the ‘Blood Bubble’, as they may not be able to visualise the size of the area.
- Tool Talks: When using tools it is essential that pupils understand how to use them safely. Before using tools, pupils should learn a ‘Tool Talk’, these are a set of instructions aimed at ensuring a good knowledge of the tool and how to use it safely. They are structured similarly from one tool to the next, so should be easy to remember.
- Tool use: After learning ‘Tool Talks’, you should spend time modelling and demonstrating the safe use of each tool. Pupils should then use the tool under supervision and when older could be trusted to use them independently.
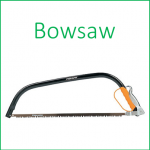
- Storage: Tools should be stored in suitable boxes. When working with young children especially, consider storing tools in a lockable box. Bow Saws ideally should be stored flat but when not possible store them with the blade up, allowing you to see when a blade cover has fallen off.
- Teaching: It is best to teach the use of bladed tools to a group you have grown accustomed to, thus allowing you to consider the best and safest way for them to learn. Once tool talks have been learnt you may consider dummy runs for the children, for example practicing with the blade cover on. When you practice using a bow saw in this method, muscle memory will help clients use it safely once the cover is removed. Also encouraging pupils to use tools in two or threes to begin with, this works especially well when one child is identified as the ‘safety officer’ ensuring others are using the tools following the rules learnt during the tool talks.
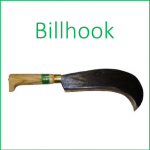
Below you will find information cards about a few key tools. They contain information about; tool parts, tool care, safe use and ‘Tool Talks’.
Purchase editable versions of the safety cards from ETSY – Click Here – Purchases help pay for site hosting fees.
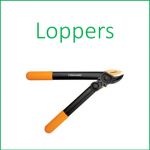
When looking at loppers there are two different types; bypass and anvil. Essentially, bypass loppers use two blades to cut the branch and anvil use one blade pressing against an anvil. To learn more about the difference ‘Click Here‘.